As we all know now, the science shows that DIY masks are particularly good at protecting those around you, in case you’re infected with COVID-19. But that doesn’t mean that you can’t do a lot to protect yourself too.
Unfortunately, many public health bodies still incorrectly claim that there is no evidence that DIY masks are useful at protecting the wearer. There’s actually plenty of evidence they can. Effective protection for the wearer of a mask depends on three critical things:
- Material: does the mask filter particles of the appropriate sizes?
- Fit: do particles squeeze in through the gaps of your mask?
- Sanitation: can you clean and re-use the mask?
Let’s look at each in turn.
Material
The droplets that you need to filter out to protect yourself when wearing a mask are smaller than those that you have to filter out to protect those around you. That’s because they evaporate rapidly to become around 5x smaller after they’re ejected from your mouth. It’s unlikely that particles smaller than 1 micron can contain the virus, and particles can be up to 100 microns, so that’s the size range that ideally we want to filter. However, I haven’t seen any studies yet that look at that size range. Nearly all studies mainly look at much smaller particles, since that’s what the official NIOSH standard requires. The good news is that anything that does well on those tests will almost certainly do even better for larger particles, so here we’ll focus on NIOSH standard tests.
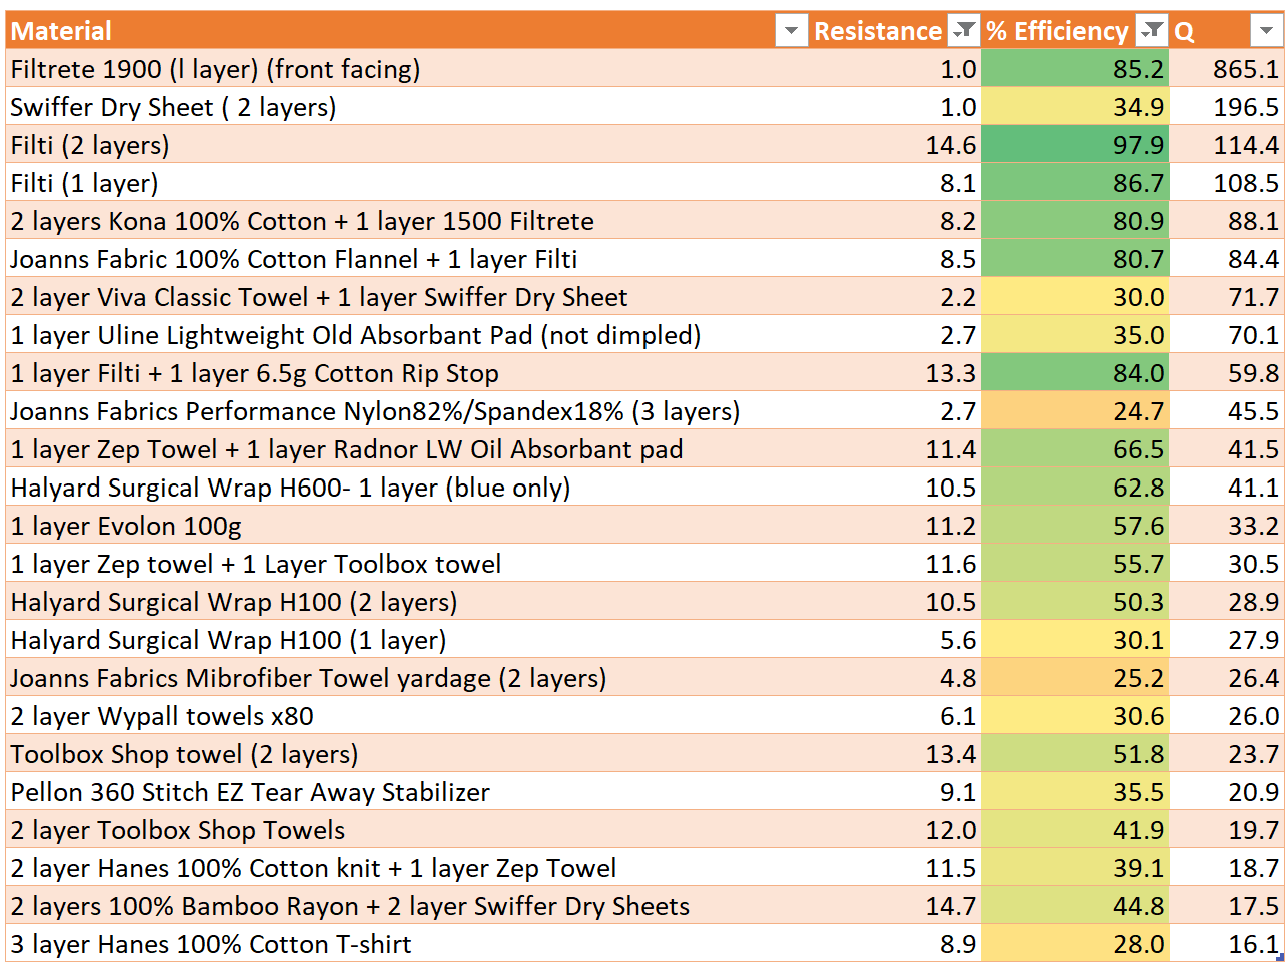
After looking at dozens of academic papers and websites, by far the best information I’ve found is in a table from maskfaq.com based on testing from TSI. I’ve extracted the best performing materials into the table below, sorted by quality, and color-coded by efficiency.

A higher efficiency is better—it shows the percentage of particles that were filtered (remember, this is with much smaller particles at a much higher flow rate than we see in practice). A lower resistance is better—it is a measure of how hard it is to breath through. The “Q” column shows the filter quality factor, which combines efficiency and resistance. For materials with high Q but low efficiency, you can use more layers to increase the efficiency (although doubling the number of layers won’t necessarily mean doubling the efficiency).
Based on this table, the clear winner appears to be Filtrete 1900. It’s over 85% effective, and has an astonishingly low resistance. There are instructions available for creating masks with this material. One piece of filter material makes hundreds of mask filters, so you can get together with your community to make lots from a single order. However, be aware of three key issues:
- It is not approved for use in masks by 3M. My guess is they just haven’t tested it and want to avoid liability; there isn’t any fiberglass or similar substances in it that might be problematic.
- It can’t be washed, and I don’t know if there are other ways to sanitize it. However, it lasts three months as an air conditioner filter.
- It might only filter small droplets, since it relies on electrostatic attraction for filtration. So it’s probably best to combine it with cotton, such as in a cloth mask with a filter pocket

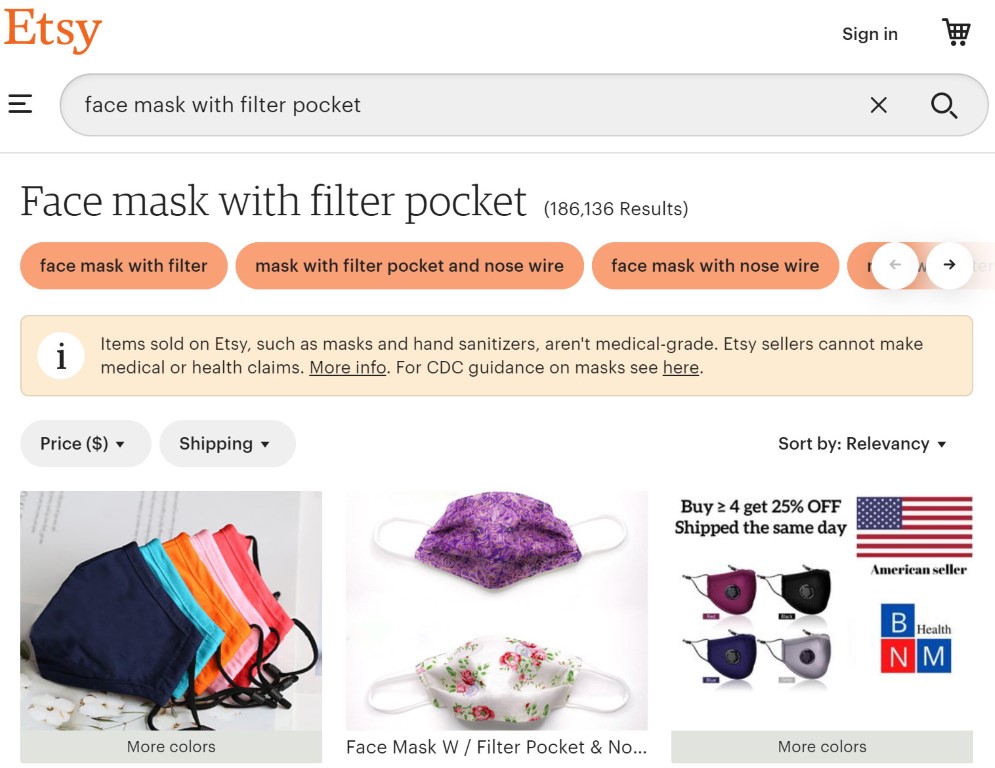
Personally, I prefer to use Filti, which is a nanofiber material specifically designed for face masks. It has the highest efficiency of any DIY material I’ve seen tested. You can buy masks with Filti pockets at Amazon or Etsy. Filti can be sanitized with heat and re-used. You can buy pre-cut material for 20 masks for around $20, which makes it better value if you’re not making many masks.
An even more economical option are shop towels. They’re not anywhere near as effective as Filti or Filtrete for wearer protection, but at around $20 for 200 towels, which you can fold to create two layers, you can stape rubber bands to them and give them away to anyone that needs them.
Fit
For wearer protection, fit is particularly important because, as you inhale, you will be sucking air (and floating particles in the air) straight through any gaps. The main places you are likely to have gaps are:
- Around your nose
- The sides of your mouth
- At the bottom of your mask.
The bottom of your mouth is easy to handle: just make sure your mask is large enough to cover well past your chin, and is nice and wide at the bottom, and you should find that that creates a good seal where your chin is.
To fit around your nose properly, use a moldable nose piece. This is the thing that sits over the bridge of your nose and you mold to follow you face. The cheapest way to make one is to cut out a piece of aluminum foil, and fold it five times, to create a strip. You can see how in the video below.
Alternatively, you can use pipe cleaner, soft wire tie, or just buy adhesive nose strips.
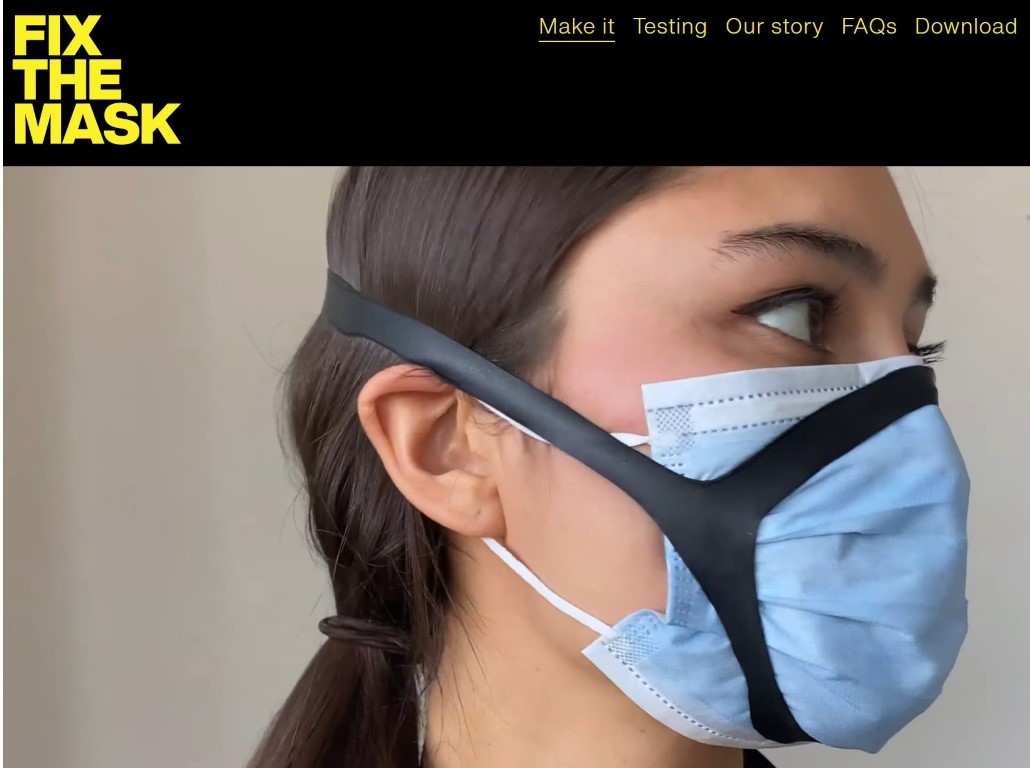
To close the gaps at the sides of your mouth (and also helpful for your nose) you can use a mask brace. There are two great approaches explained at fixthemask.com. The first approach just uses three rubber bands, and is shown in the video above. This works well, and has been tested and shown to be capable of passing the NIOSH N95 fit test. However, it can be a bit awkward and uncomfortable, so I prefer the rubber sheet brace shown here:

The only tricky bit is finding the material. I managed to find the correct type of rubber for around $20 from Amazon. One piece will make ten braces. I found that I could easily print the design on my printer and then use it as a stencil for cutting the rubber sheet with scissors. I’m not very crafty, so if I can do it, anyone can…
Another alternative to improving fit is adding a nylon stocking layer. I haven’t tried this myself, but researchers at Northeastern University have tested it and found it works well.
One tip that helps: get a larger mask with straps that tie all the way around the back, rather than just going over your ears. These can often have a much better fit. A thoroughly documented design with extensive tests is available at diymask.site.
If you have a 3D printer, there are some very thoughtful rigid designs in section IV of this paper, as well as some great fabric designs. If you have a heat sealer, there’s an excellent series of videos showing how to quickly create a mask that passes the N95 fit test. Many of these designs are available to purchase from hobbyists, crafters, and non-profits, often for no more than the cost of the materials. For instance, here is a rigid mask for just US$2.
Sanitation
For basic cloth masks, you can simply throw them in the wash. Anything involving soap will destroy the virus’s protective lipid layer. I believe that shop towels should be fine to wash too.
Most specialized filter material, including Filti, can’t be washed. Instead, put the filter material in a ziploc bag, and put it in a 160F oven for 30 minutes. (I asked one of the Stanford researchers that wrote these guidelines for tips on how to do it at home, and they suggested the ziploc bag trick.) I don’t know if Filtrete can handle these temperatures however, so you are probably best off simply disposing of Filtrete inserts when they’re dirty.
Generally you’ll probably be using specialized filter material as inserts in a cloth mask’s pocket. In these cases, take the insert out before you wash the cloth mask. If you forget, throw the insert away and get a new one — seriously, I mean it; Filti, for instance, loses about half its filtration after washing!
Recommendation
I suggest buying a large cloth mask with a Filti insert, moldable nose piece, and straps that go around the head, from Amazon or Etsy. When you need to sanitize it, put the cloth mask in the wash and sanitize the insert in the oven as described above.
If you use that kind of mask, or follow the other approaches described on this page, you should be able to achieve good protection when you go out. As well as wearing a mask, wear goggles or glasses (including sun glasses) too, since the virus can also enter through the eyes.